Name : site manager proudct list
Titan
| Color | Description | Connector Type | Purpose |
|---|---|---|---|
| Dark Red | POE | 4* RJ45 | Power over Ethernet |
| Orange | Ethernet | 4* RJ45 | Ethernet for Internet connection |
| Yellow | 48V PWM/DC FAN | 3* 3.81mm Terminal [4-pin] | PWM/DC FAN In, FAN1, FAN2, FAN3 |
| Light Green | 48V Power Input | 2* 5.08mm Terminal [2-pin] | Power Input, Main, Back-up |
| Light Blue | 48V FAN Power Input | 1* 5.08mm Terminal [2-pin] | Power Input for 48V PWM/DC FAN |
| Pink | Reserved 1 | 1* RJ45 [8-pin] | SOM RS485 |
| Dark Blue | Reserved 2 | 1* RJ45 [8-pin] | Console Port for debugging purpose only |
| Dark Purple | RS485 | 2* RJ45 [8-pin] | RS485, Modbus-RTU, RS485-1, RS485-2 |
| Dark Brown | RS232 | 2* RJ45 [8-pin] | RS232, RS232-1, RS232-2 |
| Dark Green | 1-Wire | 1* RJ45 [8-pin] | 1-Wire for Temperature Sensor |
| Light Yellow | Analog (current) | 1* RJ45 [8-pin] | Analog In, Current Sensing for Smoke Sensor |
| Light Pink | Analog (voltage) | 2* RJ45 [8-pin] | Analog In, Voltage Sensing for various Sensors |
| AirCon Control | Aircon Panel | Custom | Connects aircon control unit using custom cable |
| White | RS485 Terminal Switch | Control status for On-board RS485 | |
| Light Red | SCSI Output & LED Combo | SCSI Output [50-pin] & LED Matrix [20-indicator] | Custom SCSI Female Connector for Digital Outputs and LED matrix to indicate each output status |
| Navy Blue | SCSI Input & LED Combo | SCSI Input [50-pin] & LED Matrix [20-indicator] | Custom SCSI Male Connector for Digital Inputs and LED matrix to indicate each input status |
| Light Orange | USB 2.0 | USB 2.0 | USB 2.0 Full Speed |
Table - 10
ExoSense Quickstart
Getting Started with ExoSense
These steps walk through creating a new Exosite account and deploying your first ExoSense® condition monitoring application. At the end of these steps, a new ExoSense instance will be running.
In addition, your Exosite account provides access to the Exosite's IoT Marketplace where you can add addititional device IoT Connectors and Insight services.
Create an account
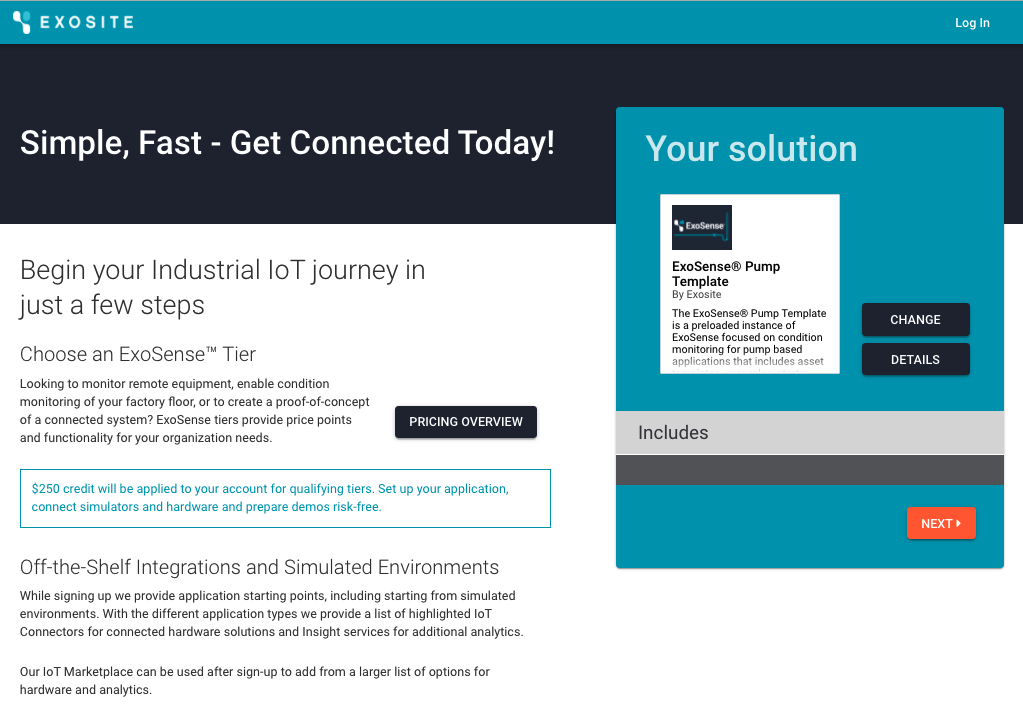
Go to https://www.exosite.io/start to create a standard Exosite account and deploy your first ExoSense application.
Here you can change your starting point, the default will deploy ExoSense as starting from scratch, which you can then build up with your own assets, groups, etc.
Alternatively, you can pick from templates that include simulated environments and partner bundled solutions. Use the CHANGE button to pick a new starting point. For this walk-through we'll use the ExoSense Pump Template but all of the starting points will be similiar. If you choose to use the defeault ExoSense template, you'll have an empty application in regards to assets, templates, and groups.
Solution Starting Points
The ExoSense templates include simulated devices and assets, which helps to have examples as a starting poing.
For this guide, we will use the ExoSense Pump Template.
Alternatively, our Partner Solutions starting points will work similiarly but may have more details provided by the partner in terms of a usage guide.
 New Account Sign-up
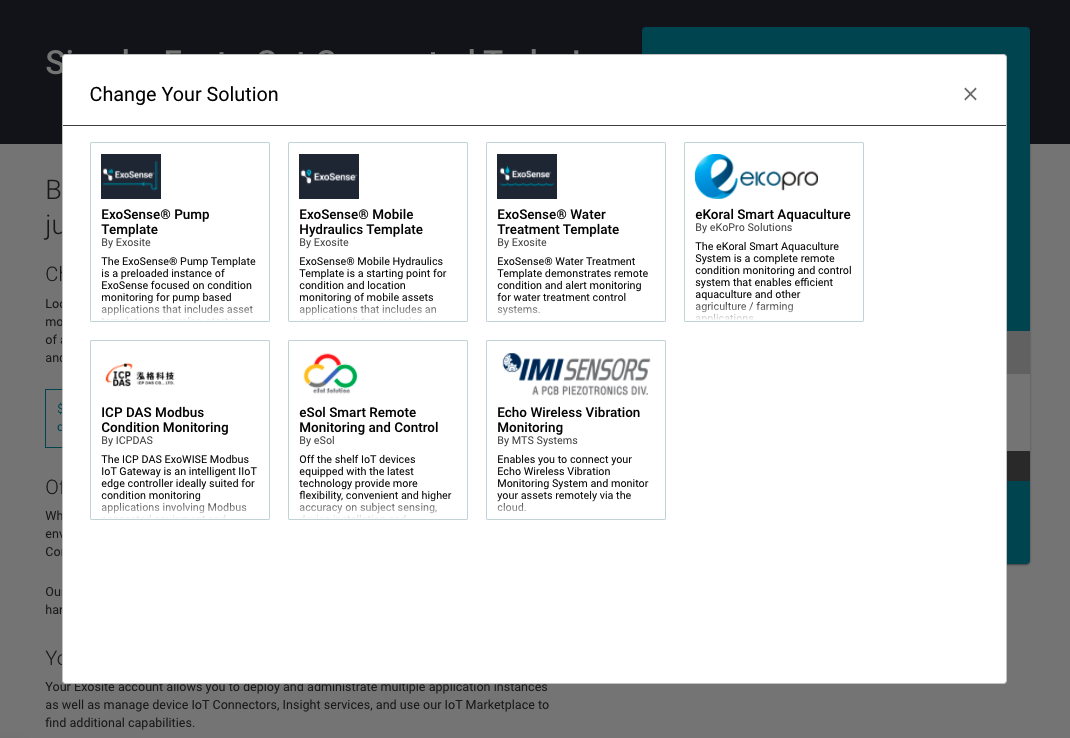 Choose a different starting template
Once you have an Exosite account, you can deploy new ExoSense instances from the Exchange Marketplace.
Now finish the sign-up process, choosing your ExoSense applicaiton tier, entering your account information, adding a credit card, and confirming all information.
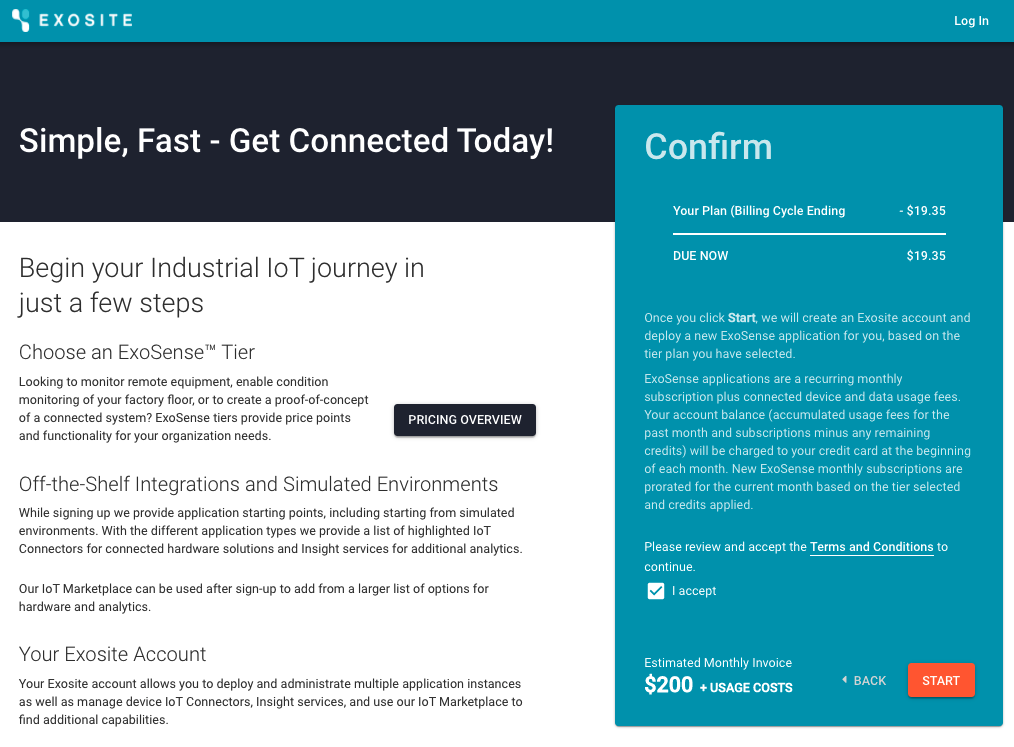 Account Confirmation
After confirming your new account, Exosite will deploy a new ExoSense instance plus device simulators and any IoT Connectors that were selected during the initial sign-up step. This takes about 30 seconds. You will be dropped into your Exosite account solution area with a link to your new ExoSense application.
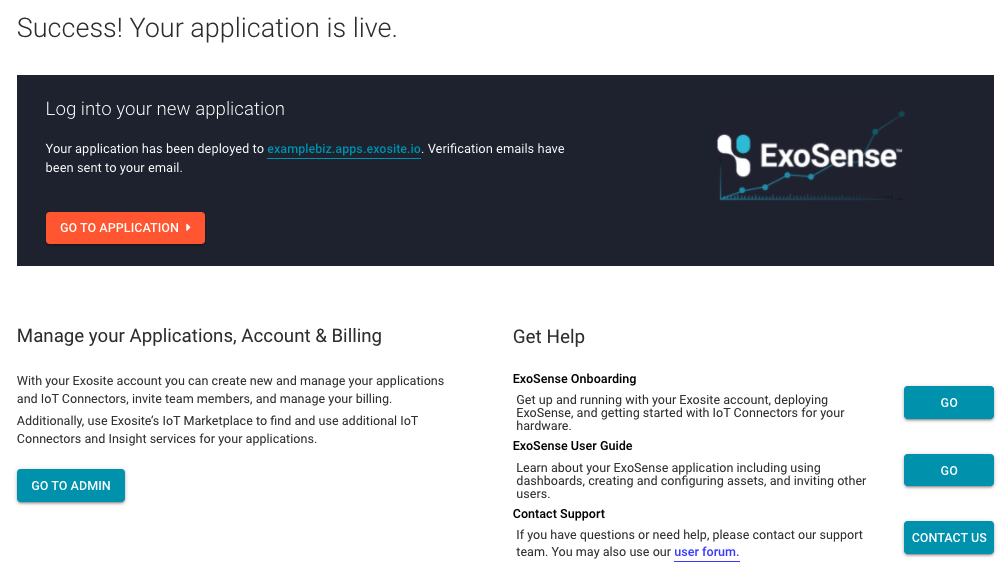 Success window
Your ExoSense application is now live! You can go to the application or to your Exosite account administration area.
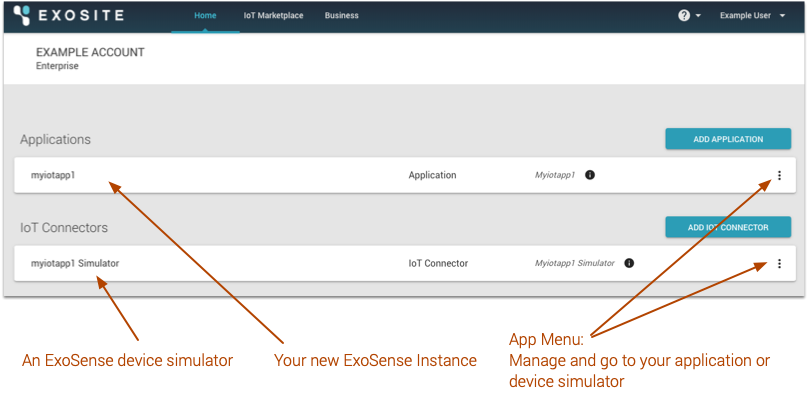 Exosite Account solution page overview
Sign into ExoSense
ExoSense runs as a standalone application at its own domain (example: https://<yourbusinessname>.apps.exosite.io). Although it is managed from the Exosite account, it is a full application in of itself and requires a separate user log-in. When you deploy, your Exosite user email is automatically invited but still needs to sign-up (register).
ExoSense's log-in is different than your Exosite account.
Your new ExoSense instance operates as it's own stand-alone application. Your user email had been invited, the same email for your Exosite account. You must use 'Sign-up' to register a new password the first time you log-in, unless your email address is set up to use Google SSO
From your Exosite account, you can open your new ExoSense instance by clicking on the application menu on the right side of your instance and click Go To Application.

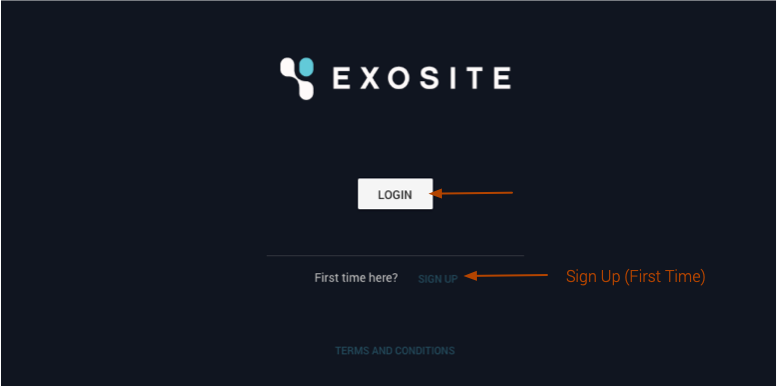 Log-in Page
The log-in page for ExoSense may have different branding logo depending on the template used
The first time you log-in to ExoSense, you must Sign-up
Email / New Password
Click on the 'SIGN UP' link on the log-in page. After entering your same email address as your Exosite account (That is the only user currently invited) and setting a new password specifically for this ExoSense application, click SIGN UP.
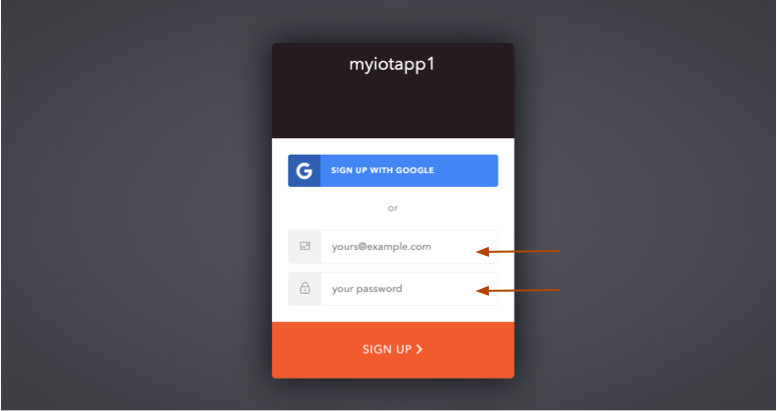 Sign-up (Register) first time logging in
Google SSO
Configure and Setup ExoSense
When you login to ExoSense for the first time, you will either have a blank starting point or some basic group hierarchy and assets created if using a template. You can begin branding the application to look like your company, create groups, add Assets, and invite users. In this guide, we started with the ExoSense Pump Template, so the hierarchy looks like the following, noting that each starting point has slighltly different branding and theme colors:
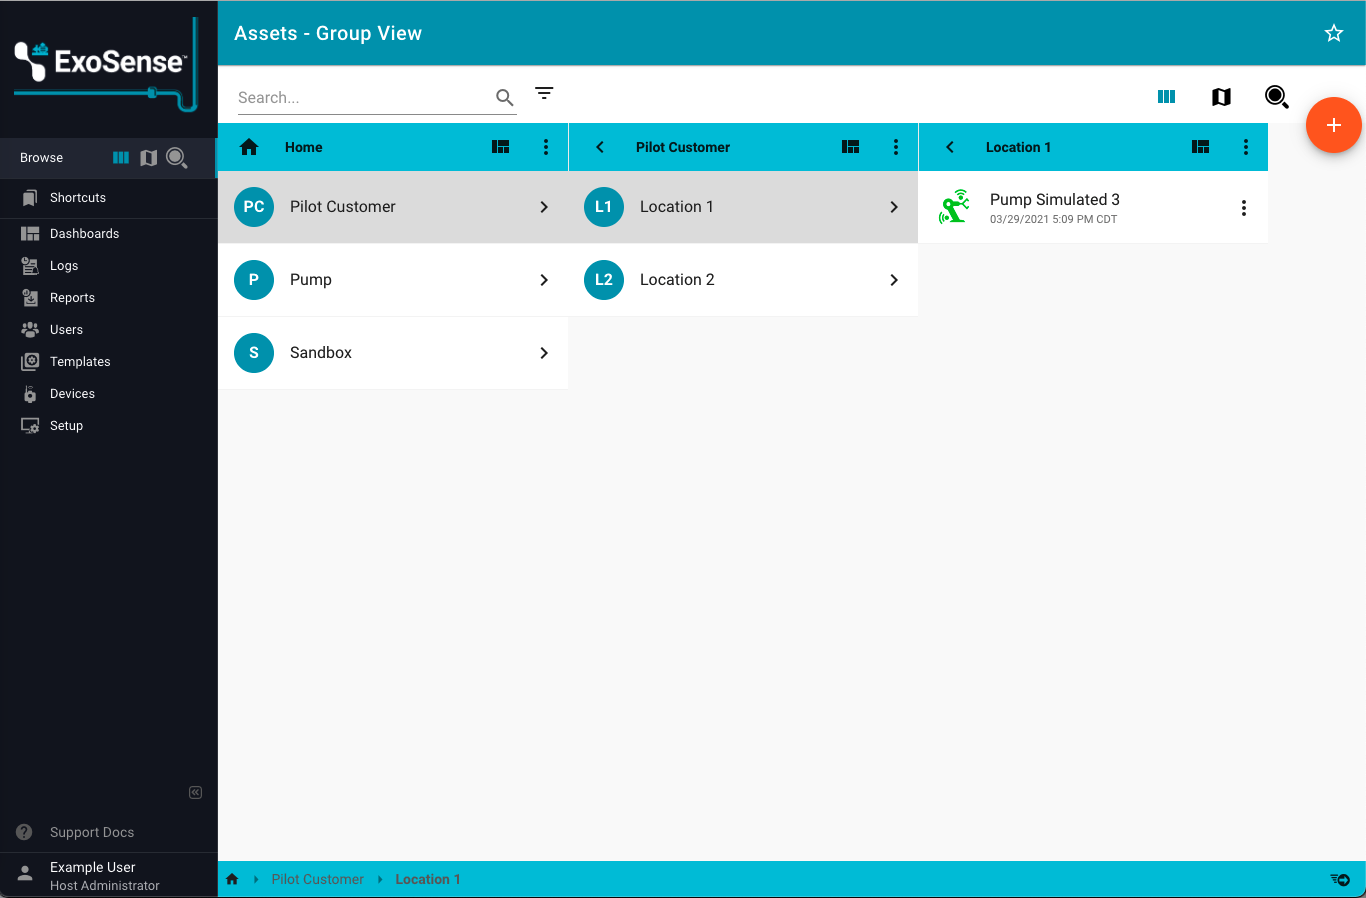 ExoSense Template Example Starting Point
![]() A new empty ExoSense Starting Point
A new empty ExoSense Starting Point
Branding
Go to the Setup page to add your own logo, setup your company colors, and name the instance. Edits made on this page are automatically applied - you'll see the real-time changes. To update the logo or Small Icon - click on the image to open an upload window from your browser.
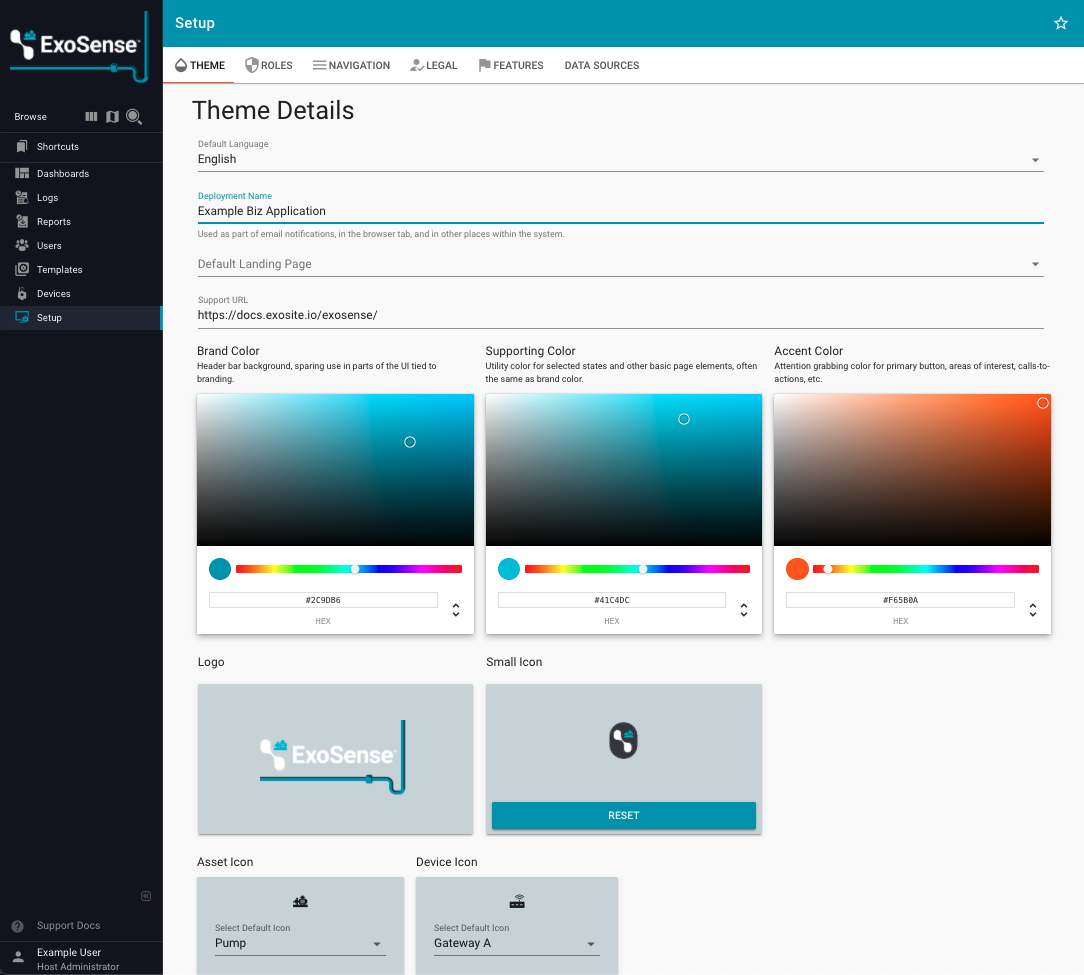 Edit your Theme to match your company branding
Add a group
Note: Groups are not available to all tiers
Groups create a permission hierarchy for users and assets. You can add a group
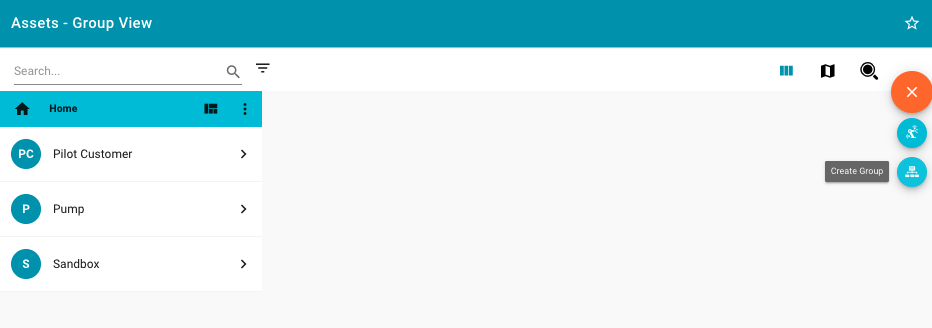 Add a group
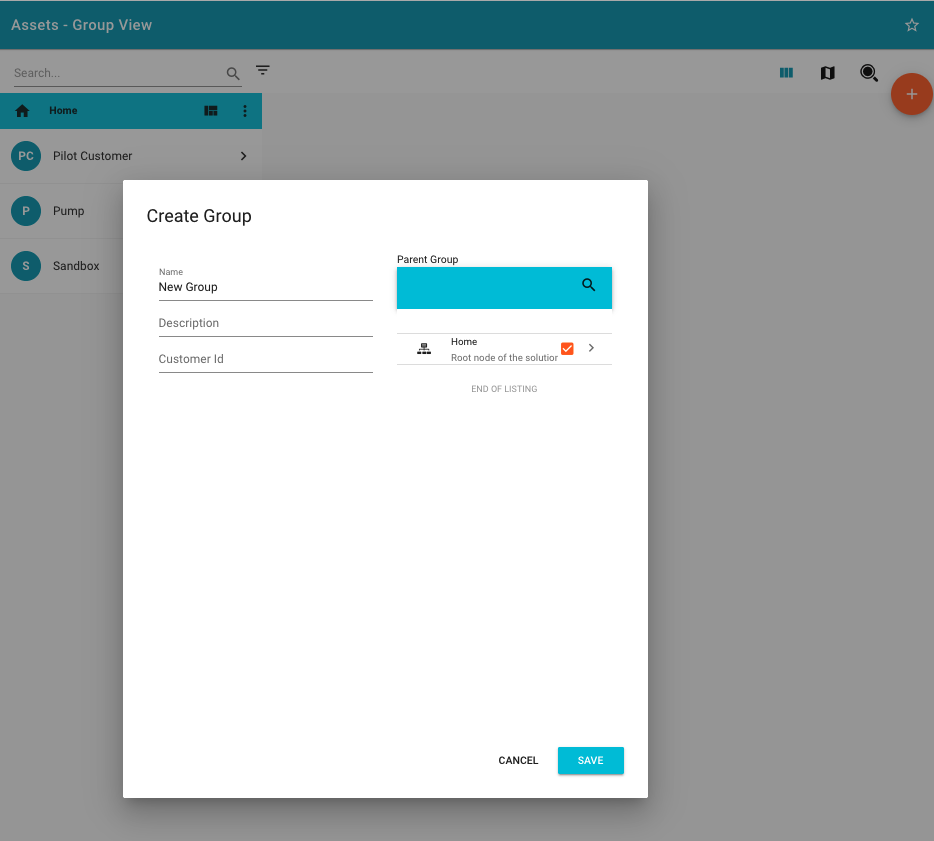 Add a group window
Invite someone else
Additional users can be invited to a specific group with a role. Roles can be created in the Setup page area.
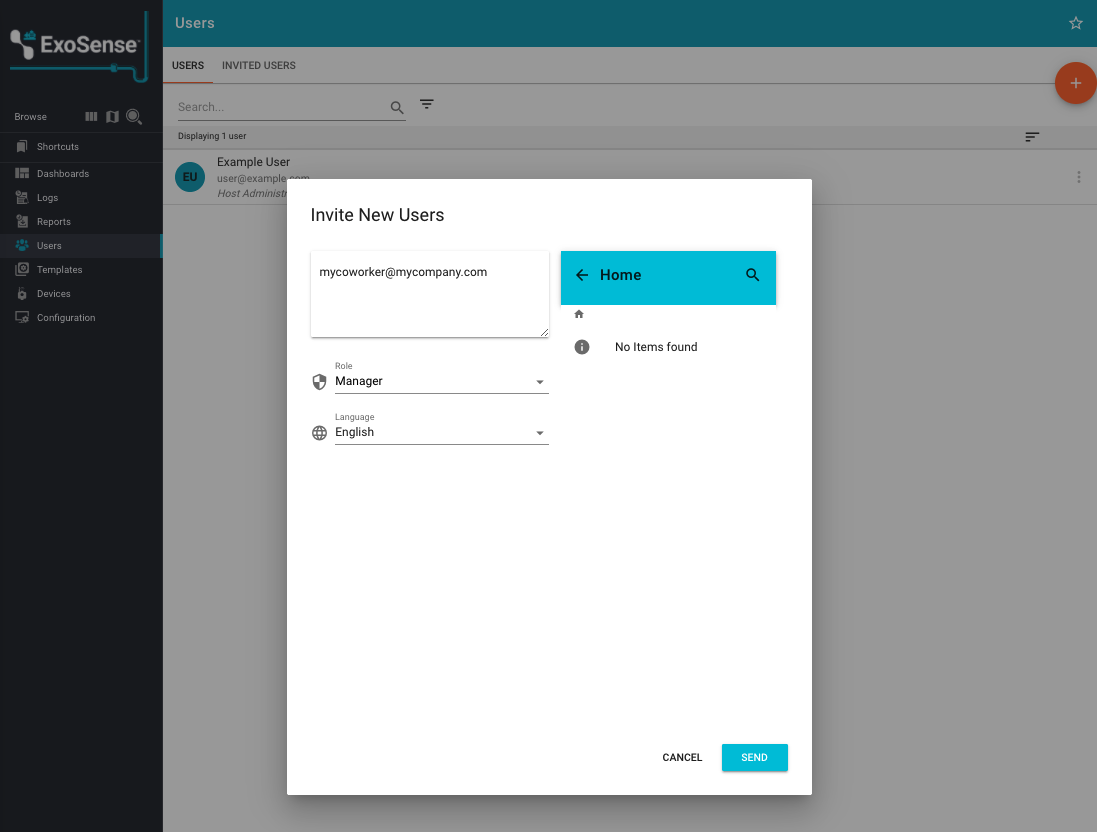 Invite another user